


Promotional pricing is always the answer whether you wish to incentivize customers to spend more on your store or to increase your average order value. Sometimes promotional offers can also help you convert your one-time customer into your loyal patrons or even boost your sales during revenue critical season. Magento 2.0 is enabled with a good set of features that can help you configure almost any kind of promotional campaign you might plan.
Magento 2.0 has its promotional rule section divided into two categories –
Catalog price rules and Cart price rules
The first category allows you to define discount rules that get applied before the products are added to cart, whereas Cart price rules allow defining discount rules that get applied on the cart.
Let’s first explore Catalog Price Rule section.
Go to Marketing > Catalog Price Rule
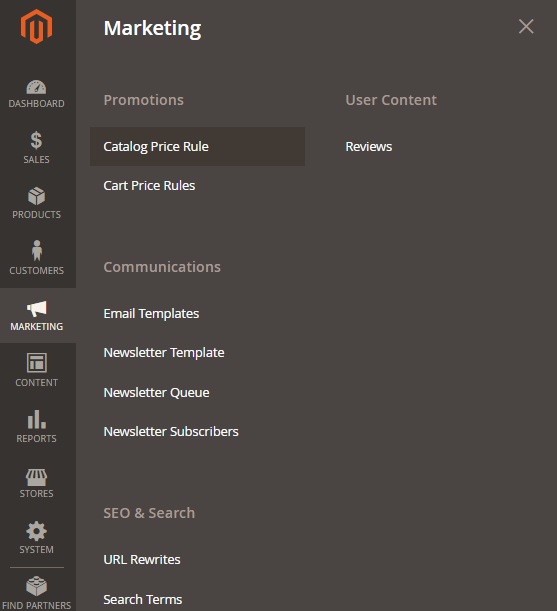
Click on Add New Rule
Rule details –
- Rule name – A rule name for your own reference. Name it so that even if you have a whole list of rules set, you can identify it among them.
- Description – A description for your reference only.
- Status – Set the status as Active/Inactive
- Websites – In case you have multiple websites, you can select the ones for which this discount rule will be applicable.
- Customer groups – You can restrict non-registered/ not-logged in customers from availing the discount. Also if you are operating on a B2B model you can set specific discount rules and percentages for customers of specific groups. You can mark/unmark multiple groups.
- From – To – A time period can be defined for the discount rule to be active. For Halloween for example you might wish this particular discount rule to active all across the month of October.
- Priority – In case you have multiple catalog rules defined and more than one of them are applicable on a product, the priority of the rule which will come into effect will be based on the value you put in here. The lower the number, higher the priority. So put in 1 and it will be applied before the rule with priority 2.
Now, go to the Conditions tab.
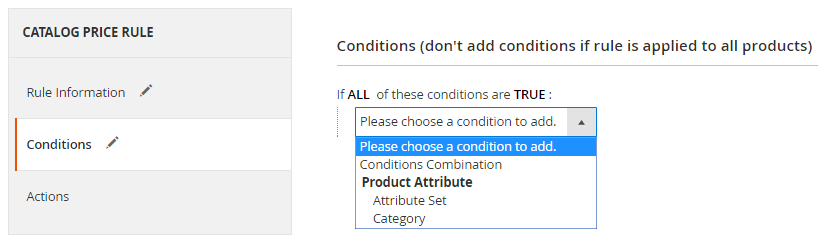
You can define a condition or a combination of conditions based on the elements Attribute set and Category.
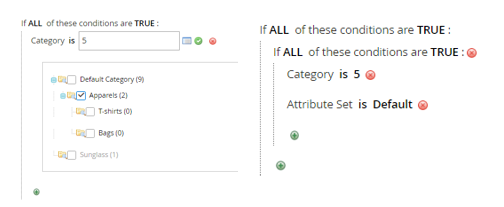
You can select multiple Categories, or multiple Attribute sets or a combination of multiple attribute sets and Categories. Based on the conditions defined here it will be decided if a product is eligible for the discount rule.
Next, go to the Actions tab.
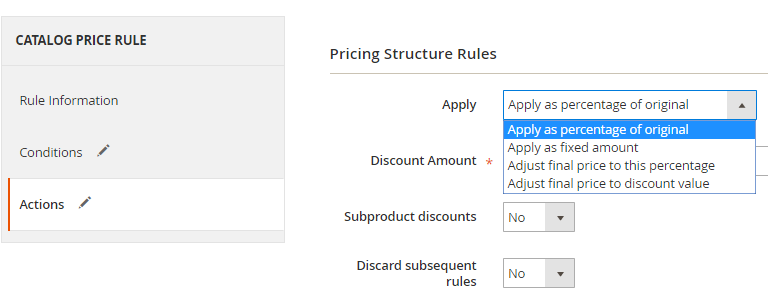
Apply – Select one of the options from the dropdown to define how you want the discount to be applied.
- Apply as percentage of original – The discount percentage will be calculated on the original price of the product and deducted from it to put up the discounted price. If the original amount is 200 USD and you select this option along with Discount Amount as 10, then the final discounted price will be 180 USD (100 – 20 (10% of 200)).
- Apply as fixed amount – The Discount Amount (fixed sum; not percentage) will be straight away deducted from the original price of the product if this option is selected. So if the original price is 200 USD and the Discount Amount is 10 USD, the final discounted price will be 190 USD (200-10 (10 fixed sum).
- Adjust final price to this percentage – The final price of the product will be actually the percentage value (Discount Amount) of the original product price. If the original product price is 200 USD and the value given as Discount Amount is 70%, then the final discounted price will be 140 USD (70% of 200 USD).
- Adjust final price to discount value – For this option whatever value you put in the Discount Amount is going to be the actual final discounted price. If the original product price is 200 USD and the Discount Amount is set as 120 USD, then the final discounted price at which your targeted customer will be able to purchase it will be 120 USD.
Subproduct discounts – Select Yes/No based on your wish to extend the discount to the sub products as well.
Discard Subsequent Rule – In case you have multiple rules defined there are chances that more than one price rule might become applicable on a product. In order to prevent that you can set the option Yes for this one which would ensure that no other rules will be made applicable when this rule will qualify. Now, you must be wondering that how does the Priority of the Catalog price rules make a difference. The Discard Subsequent Rule value will ensure that the other rules with only less priority will be prevented from becoming applicable when this rule qualifies.
Do not forget to click on Save and Apply. If you save only, the rule will not be activated.
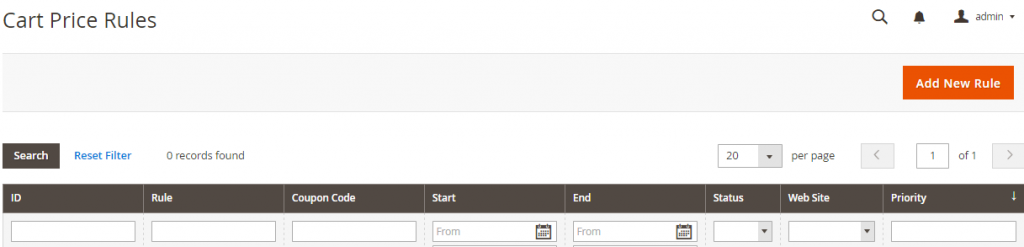
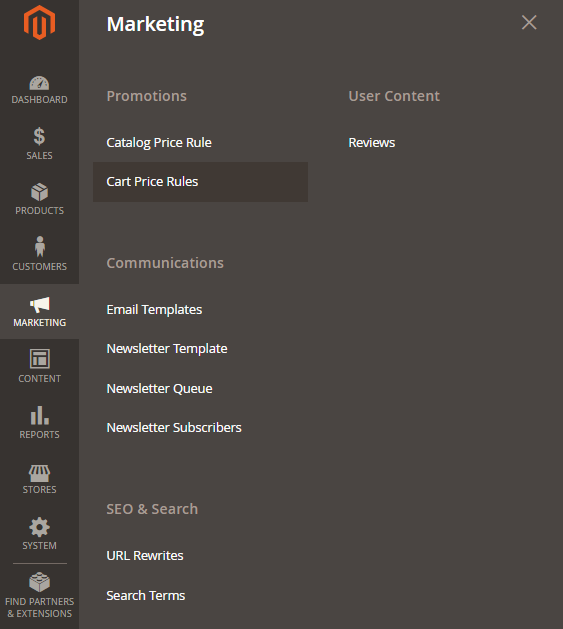
Now, let’s explore how you can configure Cart Price Rules.
Click on Add New Rule

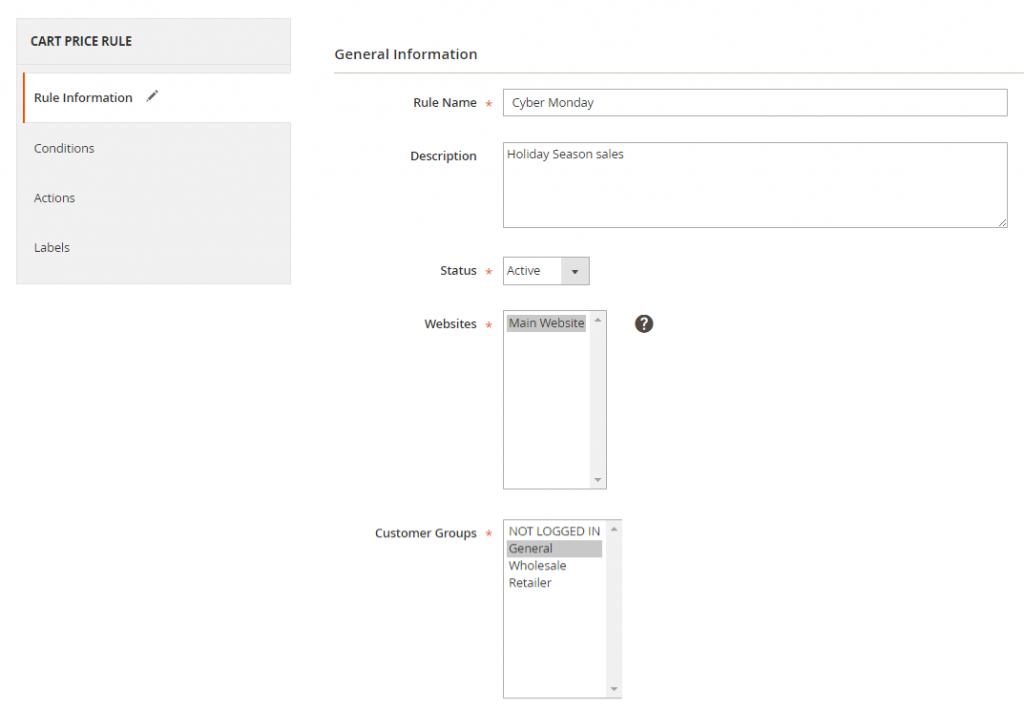
Rule Details
- Rule name – A rule name for your own reference. Name it so that even if you have a whole list of rules set you can identify it among them.
- Description – A description for your reference only.
- Status – Set the status as Active/Inactive
- Websites – In case you have multiple websites, you can select the ones for which this discount rule will be applicable.
- Customer groups – You can restrict non-registered/ not-logged in customers from availing the discount. Also if you are operating on a B2B model you can set specific discount rules and percentages for customers of specific groups. You can mark/unmark multiple groups.
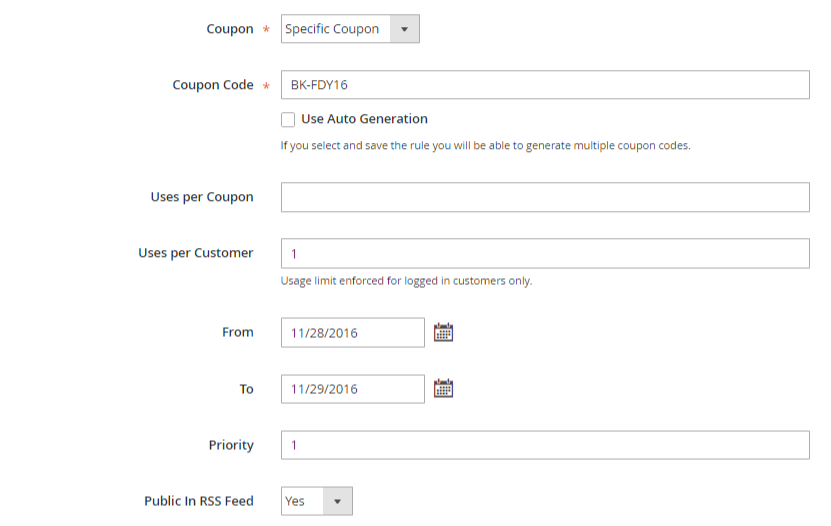
- Coupon – If you simply want to set up a rule that would be made applicable on the cart without having the customer to use any coupon, select No Coupon from the drop-down. The rule will get applied if the conditions are met. Alternatively, if you want to set a Coupon code to be used by the customers to avail the discount, select the option Specific Coupon.
- Coupon Code – In case you have opted for defining a coupon code for your customers, this is the place where you have to feed in the code.
There are two ways of configuring here –
Create a Specific Coupon:
If you want one code to be used by all customers, you can define it in the Coupon Code field.
- Uses per Coupon – You can limit the number of usage of the specific Coupon code you have defined. For unlimited use you can keep it blank.
- User per Customer – You can also limit the usage of the coupon specific to a customer. If you feed in 1, a customer will be able to use this coupon to avail discounts only once.
- From – To – You can define a particular date or a time period during which the coupon would stay valid. In case you don’t define a period the coupon will never expire. For Cyber Monday for example you can have a coupon active just for that specific Monday.
Generate a series of Coupons:
If you want a series of coupons auto generated, then this the way to do it.
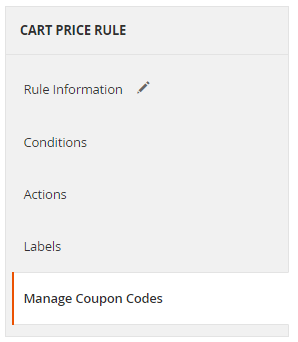
First tick the Use Auto generation checkbox and check if an extra tab called Manage Coupon Code appears on the left hand side. If not save the rule and open it again.

Now, go back to the Rule information tab again.
- Uses per Coupon – You can limit the number of usage of the series of Coupon code you want to generate. For unlimited use you can keep it blank.
- User per Customer – You can also limit the usage of the series of coupons by a specific customer. If you feed in 1, a customer will be able to use the series of coupons generated from this rule to avail discounts only once.
- From – To – You can define a particular date or a time period during which the coupons would stay valid. In case you don’t define a period the coupon will never expire.
For generating multiple coupons, go to Manage Coupon Codes tab.
- Coupon Qty – Enter the number of coupons you want to generate
- Code length – Define the code character length. This excludes the prefix, suffix and separators you can define separately in the next fields.
- Code Format – You can select whether you want the coupon code would comprise of only alphabets or only numbers or both.
- Code Prefix – If you want the first part of the coupons to be common you can define a prefix that would be added to the beginning of the code.
- Code Suffix – If you want the last part of the coupons to be common you can define a suffix that would be added at the end of the code.
- Dash Every X Character – If you want a dash in between the code characters you can define the uniform number of characters after which a dash would be placed. So in case you provide 3, there would be dash after every 3 characters and it will look like this xxx-xxx-xxx.
Click on Generate to have the coupon codes created.

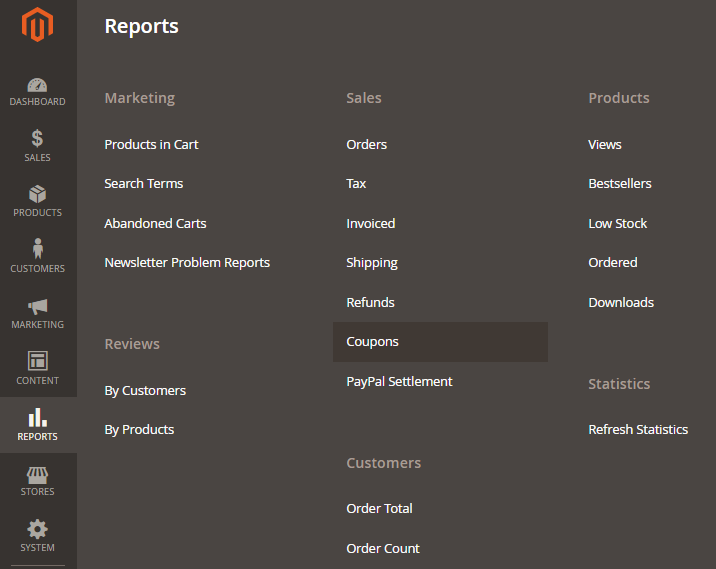
You can also see reports to evaluate how your Coupon campaign performed.
Go to Reports > Sales > Coupons
Coupon codes can be defined like this but now you have to define the conditions under which the coupon code can be applied.
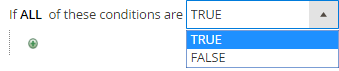
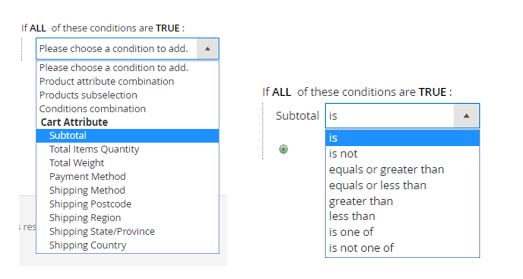
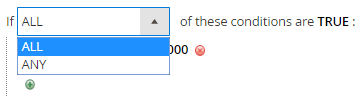
Go to the Conditions tab and you will find multiple ways to define the criteria. You can define conditions with sub conditions. Qualifying criteria could be set as either the condition being TRUE or FALSE.
Conditions can be set to check the Order subtotals or quantity in cart and qualify if they are above or equal to a value.
You can set more than one condition and define whether the coupon would be applicable if ANY or ALL the conditions are met.
Next, go to the Actions tab.
-
-
Apply – Select one of the options from the dropdown to define how you want the discount to be applied upon the coupon usage.
-
Percent of product price discount – The discount percentage will be calculated on the original price of the product and deducted from it. If the original amount is 200 USD and you select this option along with Discount Amount as 10, then the final discounted price will be 180 USD (100 – 20 (10% of 200)).
Fixed amount discount – The Discount Amount (fixed sum; not percentage) will be straight away deducted from the original price of the product if this option is selected. So if the original price is 200 USD and the Discount Amount is 10 USD, the final discounted price will be 190 USD (200-10 (10 fixed sum).
Fixed amount discount for whole cart – In the previous option the Discount Amount is to be deducted from individual product prices. So if you had 3 products each costing 100, and the Discount Amount was 10, your total cart value would have been 270 USD. But in this option the Discount Amount will be deducted from the cart total. So the final cart value would be 290 USD (300 – 10)
Buy X get Y free (discount amount is Y) – This option can help you enable a condition like, if a customer buys X number of products he will get Y number of products for free. The number of products he needs to buy to avail this offer has to be defined in the field Discount Qty Step (Buy X) and the number of products he would get for free has to be defined in the field Discount Amount. For example, if you set the value for Discount Qty Step (Buy X) as 6 and Discount Amount as 1, then on adding 7 products to cart, the cart total value would be 6 products’ cost.
-
Maximum Qty Discount is Applied To– In case you want to specify a minimum number of products that has to be there in the cart for the coupon to become applicable, feed in with the value in this field.
-
Discount Qty Step (Buy X) – As described above you have to put here the number of products that a customer needs to add to the cart to get certain number (Discount Amount) of that product for free. Now, this is a scenario when you have selected the Buy X get Y free (discount amount is Y). But this Discount Qty Step (Buy X) value is also applicable in case you choose Percent of product price discount. For example, if you put 10% in Discount Amount and 5 in Discount Qty Step (Buy X), a customer on adding 5 products to cart will get each product at 10% less.
-
Apply to Shipping Amount – Choose yes if you wish to give discount on the Shipping cost as well.
-
Discard subsequent rules – If you do not want others rules to be made applicable after this cart rule is applied choose ‘Yes’. Please note, only rules with lower priority will be discarded based on the value of this field. Rules with better priority value will not be stopped.
-
Free Shipping – Select ‘No’ if you do not wish to provide free shipping to the customer for whom this cart rule is applicable.
For matching items only – Shipping charges will not be levied on those items that qualify for this cart rule.
For Shipment for matching items only – Shipping charges will not be levied on the entire shipment if there are any items that qualifies for this cart rule.

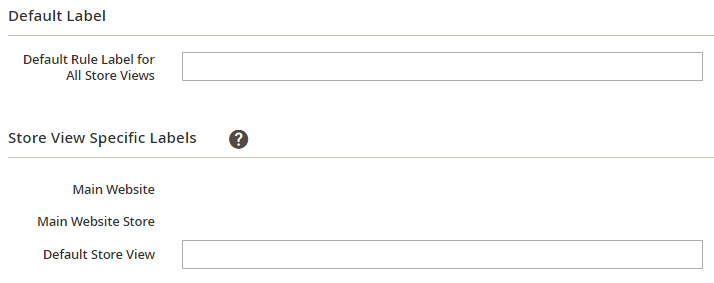
The last part is the labels tab.
Here you can set the label for the discount for your different stores / store views.
Do not forget to click on Save, else all the configuration will be lost.
So this is how you can enable the different pricing rules in Magento and run promotional campaigns. If you are entering all the Magento orders into your ERP manually we have the right solution for you. Even orders with complex discount rules applied can be recreated in your ERP in real time with accurate details. Get in touch with us if you wish to know how.
You might also like:
Inventory Management in Magento 2.0
Magento 2.0 Bug in Core Sales Module
Cross-Selling information sync between SAP ECC and Magento